French tips get a bad reputation among people with short nails. Most tutorials show that classic white tip on long almond or coffin shapes, so it’s easy to assume the look just won’t work on stubby, practical nails. That’s not true. The tip line can shrink or shift to fit any nail length, and shorter nails actually make the style easier to keep neat since there’s less surface for the polish to smudge or chip. Some of the best versions right now skip the stark white altogether for softer, more wearable colors. Whether your nails are barely-there short or grown out long, there’s a version of this classic that fits your hands. Here are 15 fresh takes worth saving.
1. Colored French Tip
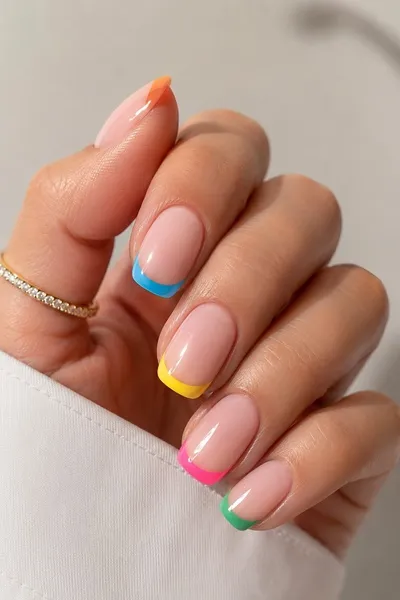
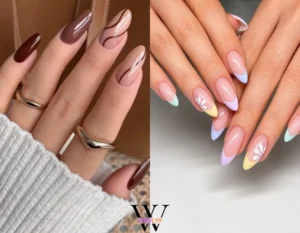
Each nail in this set gets its own bright tip color instead of the usual white. The thumb wears a soft orange, then the fingers move through blue, yellow, hot pink, and green, all painted over a sheer, natural-looking base. The nails are short to medium in length with a rounded square shape, so the look stays practical for everyday hands. Every tip has a clean, smooth curve and a glossy finish that catches the light. Nothing about the base coat looks stark white, which keeps the overall effect soft rather than bold. This rainbow take works well for spring or summer, and it’s an easy way to test colored tips without picking just one shade. Since the tips are simple solid blocks of color, this design is beginner-friendly and simple to recreate at home or ask for at a salon.
2. Ombre French Tip
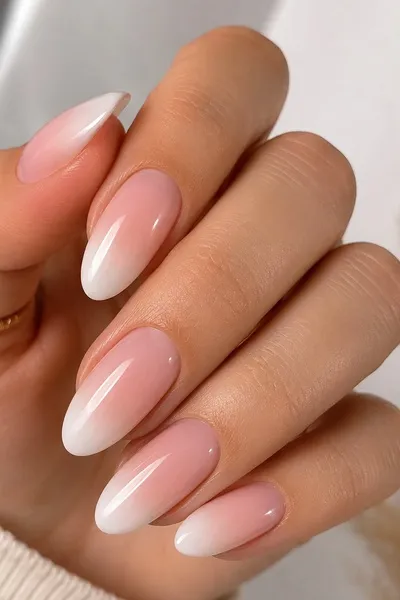
These nails fade from a soft pink base into white at the tips, with no hard line in between. The shape is long and almond, tapering to a rounded point at the end. White polish gets blended right into the pink, so the color shift looks smooth and blurry instead of sharp. A glossy topcoat makes every nail shine under the light. This soft, blended look reads more romantic than a classic French tip, and it works nicely for weddings or any dressed-up occasion. Getting that smooth gradient usually takes a sponge or brush technique, so it can be trickier to do at home than a solid color block. If you want length and a polished look without a bold white line, this ombre style is worth showing your nail tech.
3. Side-Swept French Tip
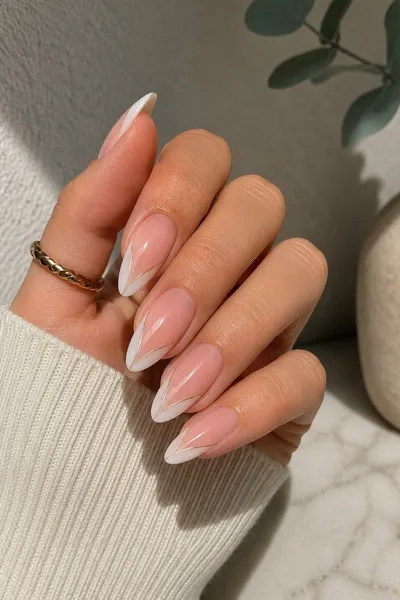
Instead of a straight line across the tip, this white edge cuts at a diagonal angle from one side of the nail to the other. A thin gold line traces the border between the white and the natural pink base, adding a little extra sparkle. Nails here are long with a pointed almond shape, giving the angled tip plenty of room to show off its slant. The finish looks smooth and glossy all around. Every nail follows the same diagonal direction, so the set reads as one cohesive design instead of random shapes. This angled take feels more modern than a traditional straight French tip, and the gold outline gives it a slightly dressed-up touch. Because of the fine metallic line, this one leans toward salon work rather than an easy at-home DIY, especially if you want it crisp and even.
4. Striped French Tip
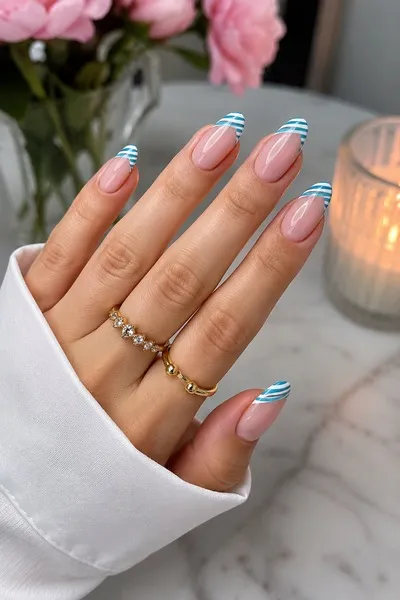
Thin blue and white stripes replace the usual solid tip on these nails, running diagonally across each curved edge. The base stays a sheer, natural pink, letting the striped pattern stand out as the main focus. Nails are long with a rounded almond shape, and every tip shows a clean, glossy finish. Lines look evenly spaced and follow the curve of the nail tip closely, which points to careful, steady hand painting or striping tape. Blue and white together give this design a breezy, nautical feel, perfect for summer or a beach trip. Getting straight, even stripes at that angle takes patience, so beginners might want striping tape or a nail art brush instead of freehanding it. If you like pattern play more than a plain color block, this striped version is a fun way to switch up a classic tip.
5. Geometric French Tip
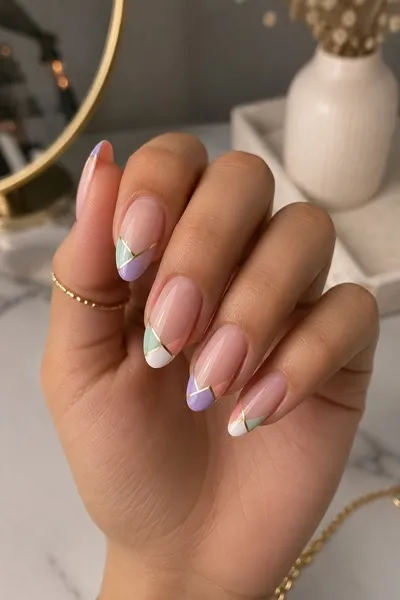
Each tip here splits into two triangle shapes instead of one solid color block. Soft pastels like lavender, mint green, white, and peachy pink pair up in different combinations across the fingers, with a thin gold line running down the middle of each split. The base is a sheer, natural pink, and nails are long with a rounded almond shape. Every triangle edge looks crisp and sharp, not blended, which gives the whole set a clean, structured look. No two nails wear the exact same color pairing, so the set feels varied while still matching in style. This split-tip design adds a modern twist to a classic French shape without going too bold. Because of the sharp lines and thin metallic divider, it takes a steady hand or a nail tech to get those triangles even, so it’s better suited to salon visits than a quick DIY manicure.
6. Matte Finish French Tip
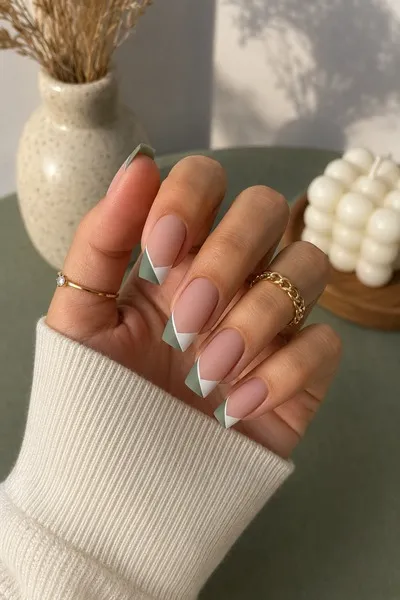
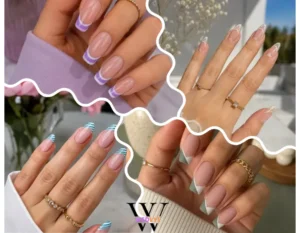
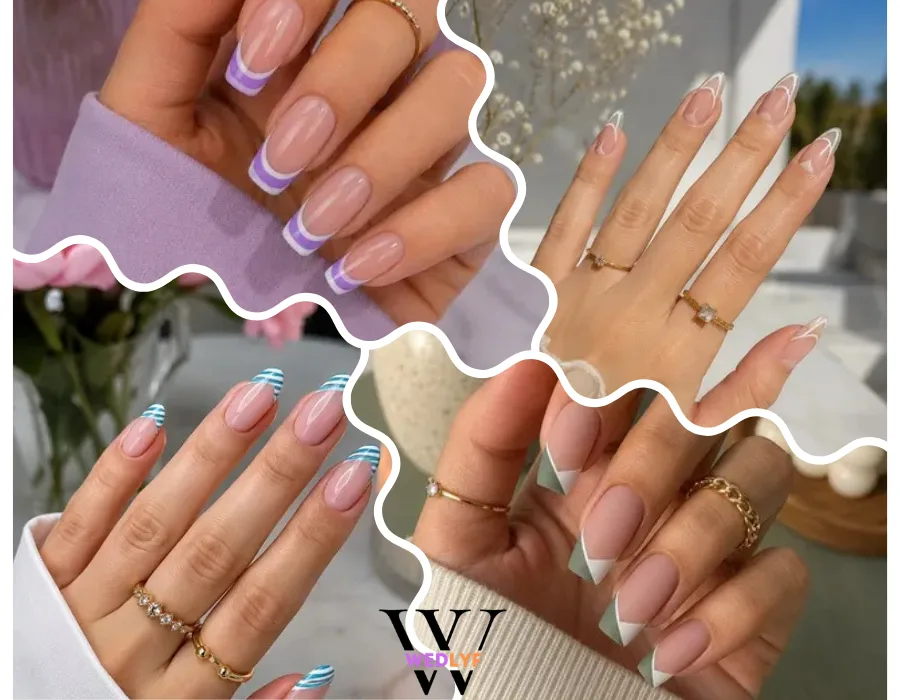
These nails skip the shine completely, with a flat, no-gloss finish across every surface. Sage green wraps each tip in an angled shape, cutting diagonally instead of running straight across, and a white triangle sits between the green and the natural pink base. Nails are long with a squared-off tip, giving the angled color blocks a sharp, clean edge to sit against. The matte texture makes the green look softer and a bit chalky compared to how it would look glossy. Sage and white together feel earthy and calm, more muted than a typical bright French manicure. This design suits anyone who likes a quieter, more neutral color palette over bold shades. Matte topcoats need a bit of care since they can show fingerprints and scuffs more easily than glossy ones, so this look works best for people willing to touch up their topcoat now and then.
6. Floral French Tip
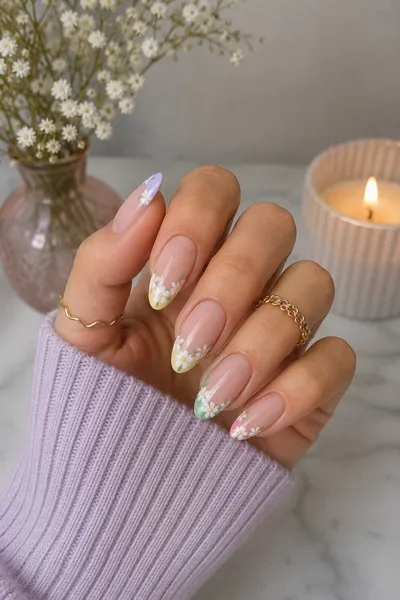
Small white daisies with yellow centers sit right at the edge of each nail, replacing the usual solid French tip. Each flower cluster rests on a different pastel base color, cycling through lilac, yellow, green, and pink across the set. Thin green leaves and stems connect the daisies together near the nail’s edge. The shape is long and almond, with a smooth, glossy topcoat over everything. Painting the tiny flowers by hand takes a fine detail brush and a steady grip, so this look isn’t the quickest to recreate at home. Pastel colors and dainty florals give this style a soft, springtime feel that works well for garden parties or Easter. Anyone who loves delicate nail art over bold color blocks will like this one, though it’s worth booking extra time with your nail tech for the hand-painted detail.
7. Holographic French Tip
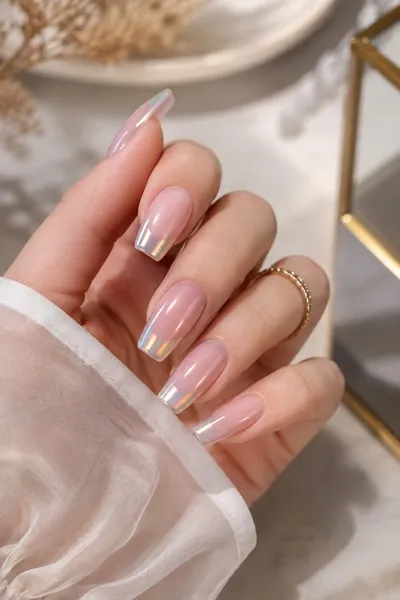
A soft mauve-pink base covers each nail, but the tips shift color depending on how the light hits them. Gold, pink, green, and purple flash across the same tip as the hand moves, giving it that shifting, oil-slick look people search for under holographic nails. The shape is long with a squared, coffin-style tip, and the whole set has a high-shine, glossy finish. Chrome powder or a similar shimmer technique likely creates that rainbow shift, though the exact method isn’t something you can confirm just by looking. Tips catch light so well that they almost look metallic in some shots and more pastel in others. This design works great for anyone headed to a party or a night out, since the shifting color adds movement even when your hands are still. Chrome and holographic finishes usually need a gel base and some skill to apply evenly, so this one is best left to a nail tech.
8. Neon French Tip
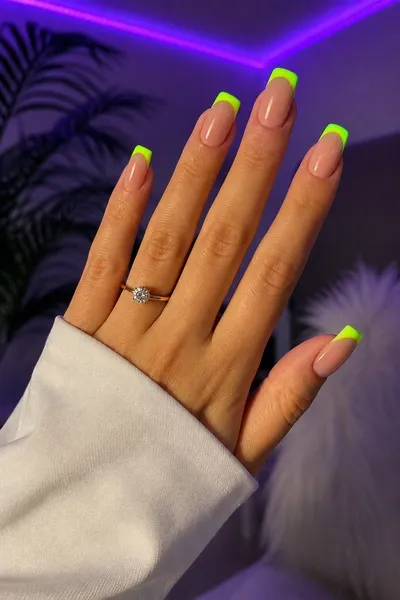
A bright, electric yellow-green covers the tips here, standing out hard against the sheer nude base underneath. Nails are long with a squared shape and straight sides, so the tip line reads as a clean, bold band across each one. The finish looks smooth and glossy, letting that neon shade really pop under any light. Under the purple-lit background in this photo, the green almost seems to glow, though that’s partly the lighting and not just the polish itself. This color-block tip skips soft pastels entirely for something loud and attention-grabbing. Neon tips like this fit summer, festivals, or anyone who wants their manicure to be the first thing people notice. Since it’s a solid block of color with a straight edge, it’s fairly simple to recreate at home using striping tape to keep that clean tip line sharp.
9. Two-Tone French Tip
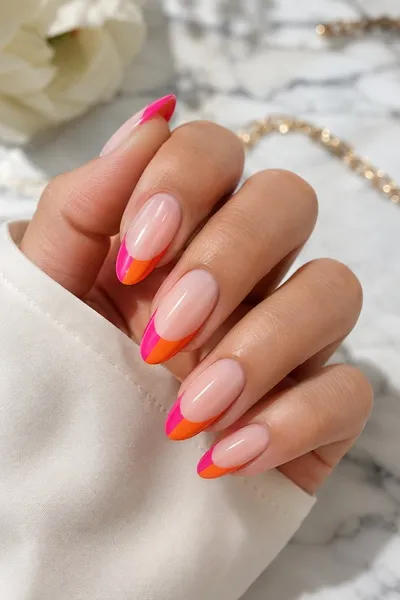
Hot pink and bright orange split each tip right down the middle, one color on each side instead of a single solid shade. The line between the two colors runs straight and clean, meeting at a point near the center of the nail. A sheer, natural pink base sits underneath, letting the two-tone tip stand out as the focal point. Nails are medium to long with a rounded, slightly tapered shape, and everything has a glossy, shiny finish. Pink and orange next to each other give off a fun, summery energy, kind of like a sunset. This two-tone approach is an easy way to work two trending colors into one manicure instead of picking just one. Since the color split is a straight line, it’s doable at home with thin brushes or tape, though keeping that center line perfectly straight does take a little practice.
10. Negative Space French Tip
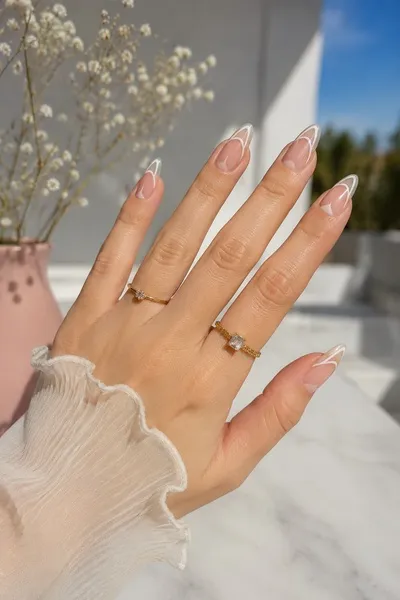
Instead of a filled-in tip, this design just outlines the edge of the nail with a thin white line. The bare nail shows through inside that outline, so the natural color underneath becomes part of the look. Nails are long and almond-shaped, tapering to a smooth point at the tip. The white outline curves along the top edge and cuts down into a small V near the center of the nail bed. Everything has a glossy, polished shine. Skipping the solid fill makes this version feel lighter and more open than a traditional French tip, almost like line art on the nail. It’s a good pick for anyone who wants a manicure that still reads as elegant without much color on the nail at all. Getting that outline thin and even usually calls for a fine detail brush, so it takes more precision than a basic tip and works best done by a nail tech.
11. Dotted French Tip
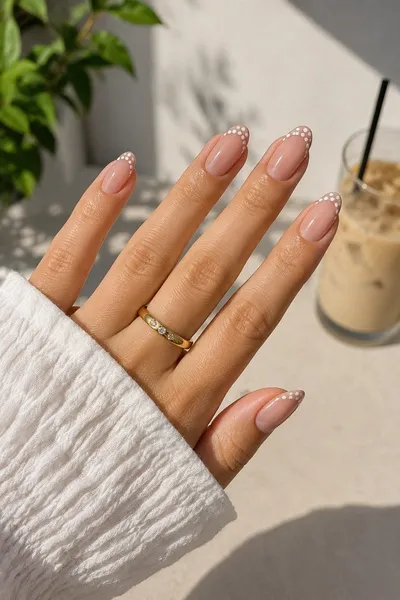
Small white dots line up along the tip of each nail here, taking the place of a solid painted edge. The dots follow the curve of the nail closely, spaced out evenly from one side to the other. A sheer, natural pink base sits underneath, so the dotted line reads clearly against bare-looking nails. Nails are short to medium with a rounded, almond-leaning shape. The finish looks glossy and smooth overall. This dotted version feels more subtle than a solid French tip, more like a hint of detail than a bold statement. It suits shorter or more practical nails well, since the small dots don’t take up much space and still look put together. A dotting tool or the end of a bobby pin makes this doable at home, though keeping the dots even in size and spacing takes a little practice.
12. Reverse French Tip
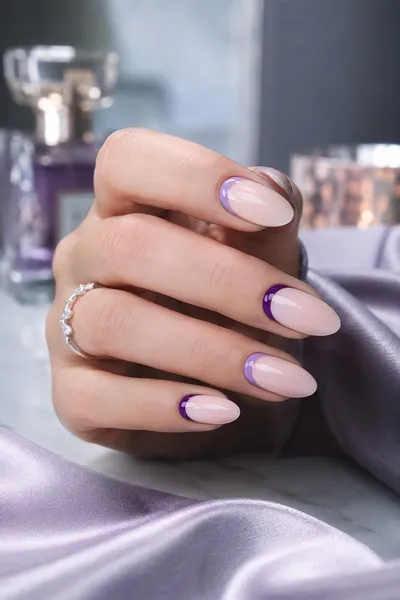
Color here shows up at the base of the nail instead of the tip, which flips the usual French manicure formula. Each nail has a curved band of purple sitting right at the cuticle, shaped like a smile line, while the rest of the nail stays a soft, sheer pink-nude. The shade alternates between a deep purple and a lighter lavender across different fingers. Nails are long with a rounded, almond-style tip, and the whole set has a smooth, glossy finish. Since the color sits at the base and not the free edge, this design draws the eye toward the cuticle area in a way a normal French tip doesn’t. It’s a fresh spin for anyone who’s done the classic tip look a hundred times and wants something less expected. Painting a clean curved line right at the cuticle takes precision, so this one is easier to get sharp with a nail tech than freehand at home.
13. Chevron French Tip
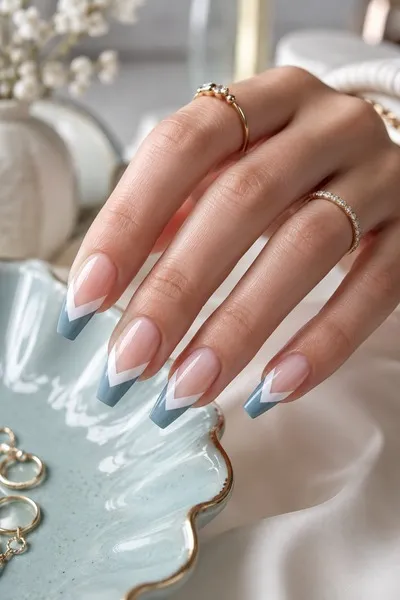
The tip on each nail forms a sharp V shape instead of a rounded curve, pointing back toward the cuticle like an arrow. A slate blue-gray color fills the outer point, with a thin white outline tracing the edge of the V before it meets the natural pink base. Nails are long with a tapered, coffin-style shape, which gives the angled chevron plenty of room to stretch down the nail. The finish is glossy and smooth throughout. That sharp point makes this tip style read as more graphic and precise than a standard rounded French tip. Muted blue-gray keeps the whole look feeling grown-up rather than playful, good for anyone who wants an edit on the classic style without going bold. Getting the V shape symmetrical on both sides takes a careful hand, so this one is best done by a nail tech rather than attempted freehand at home.
14. Double French Tip
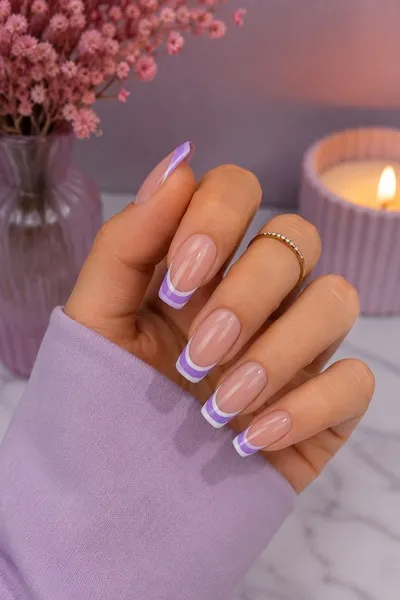
Two stacked lines sit at the tip of each nail here, a solid lavender band followed by a thin white line right at the edge. The natural pink base peeks through above the color, so it still reads as a French manicure with an extra layer built in. Nails are long with a squared-off tip, giving the stacked bands a clean, straight edge to sit on. Everything has a smooth, glossy shine. Splitting the tip into two bands instead of one gives the classic French shape a bit more visual interest without adding a lot of color. Lavender and white together feel soft and a little playful, good for spring or any time you want something slightly different from a plain white tip. Since it needs two straight, evenly spaced lines instead of just one, striping tape or a steady nail art brush will help keep those bands crisp if you try it at home.
15. Glitter Gradient French Tip
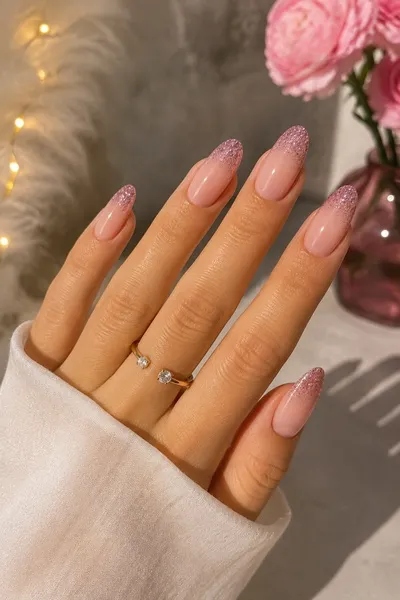
Pink glitter builds up at the tip of each nail, getting denser toward the edge and fading out into a sheer, natural pink base. There’s no hard line separating the glitter from the bare nail, so the sparkle looks like it’s dusted on rather than painted in a solid block. Nails are long with a rounded almond shape, and the glitter itself sits under a glossy topcoat that keeps everything smooth to the touch. Some tips show heavier sparkle than others, giving the set a little natural variation instead of looking too matched. This glittery fade feels festive and dressed-up, a good choice for holidays, birthdays, or New Year’s Eve. Blending glitter into a fade like this takes some patience with a sponge or dabbing brush, so it’s more advanced than a simple solid-color tip and often turns out best with a nail tech’s help.
DIY vs. Salon: Which of These You Can Actually Pull Off at Home
Not every design on this list needs a trip to the nail salon. A few of these are genuinely doable with a steady hand and some patience. The colored French tip, neon tip, and dotted tip are your best bets for a first attempt, since they’re solid color blocks or simple dots with no blending or fine lines involved. Striping tape helps a ton with straight edges, like on the two-tone or double French tip designs.
Anything with a hard-to-blend gradient gets trickier fast. Ombre and glitter gradient tips both need a sponge or dabbing technique to avoid harsh lines, so expect a few practice runs before your first one looks clean. And once thin metallic lines, tiny painted flowers, or sharp geometric points enter the picture, that’s usually your cue to book an appointment instead. Designs like the side-swept tip, geometric tip, floral tip, and chevron tip all rely on precision that’s hard to nail without training, literally.
If you’re new to nail art, start simple. Pick a solid color block or a dotted design first, get comfortable with your brush control, then work up to the fussier stuff. Your nail tech will always get sharper lines faster, but there’s something satisfying about doing your own manicure right the first time.
Related Articles
Acrylic Nail Ideas
Halloween Nail Ideas
Back to School Nails Ideas